calcite parser代码生成详解
本文代码均已上传到gitee
calcite的parser代码生成分为如下两个步骤
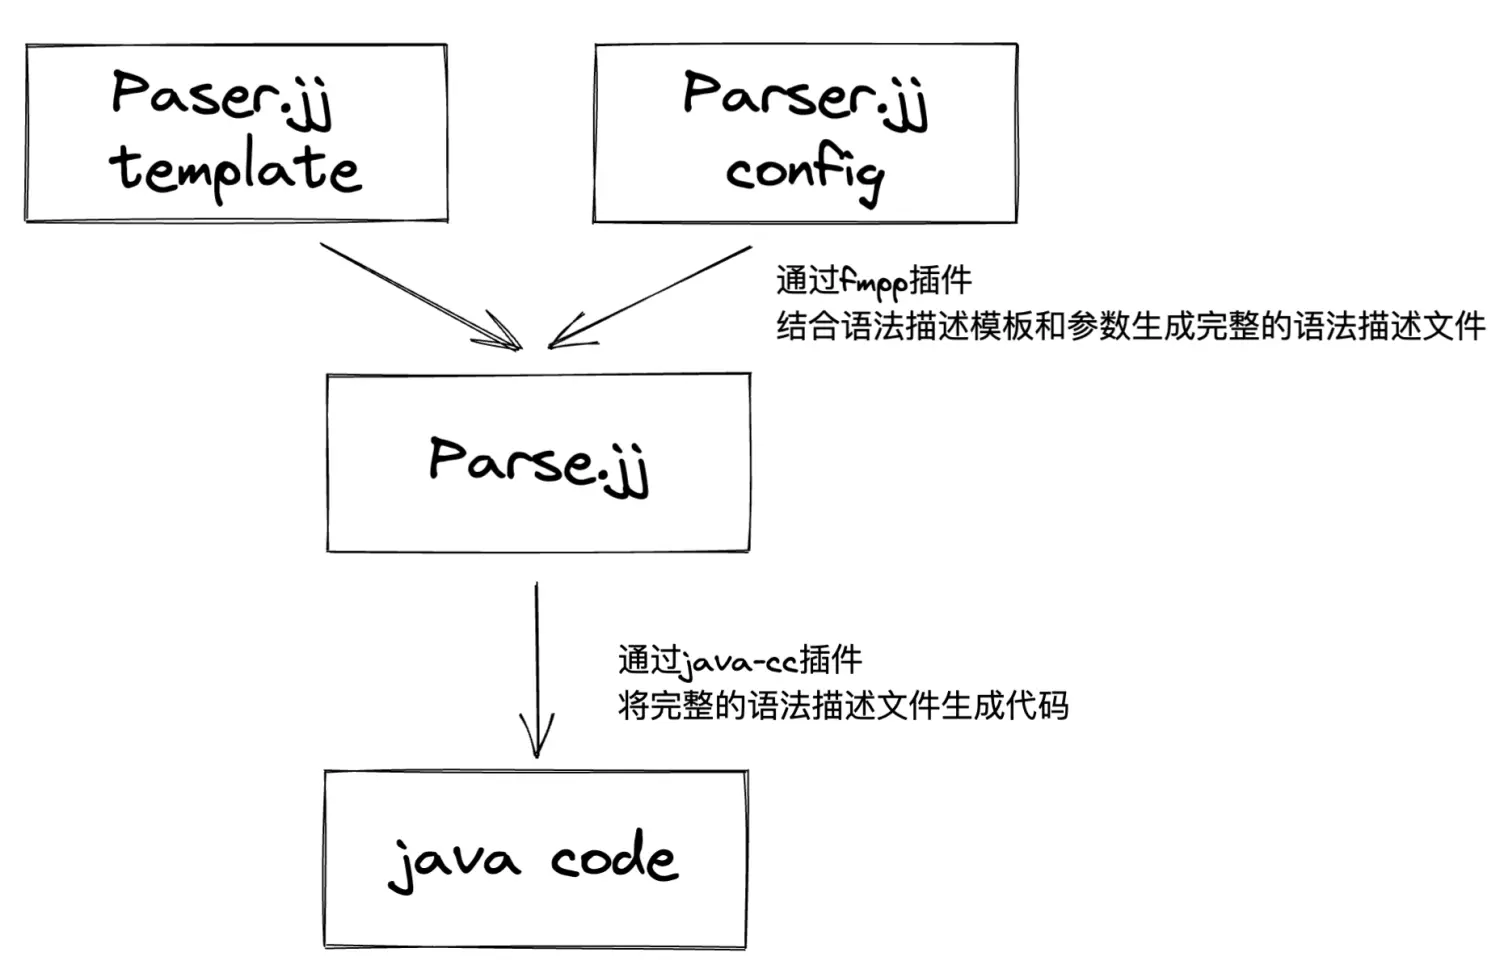
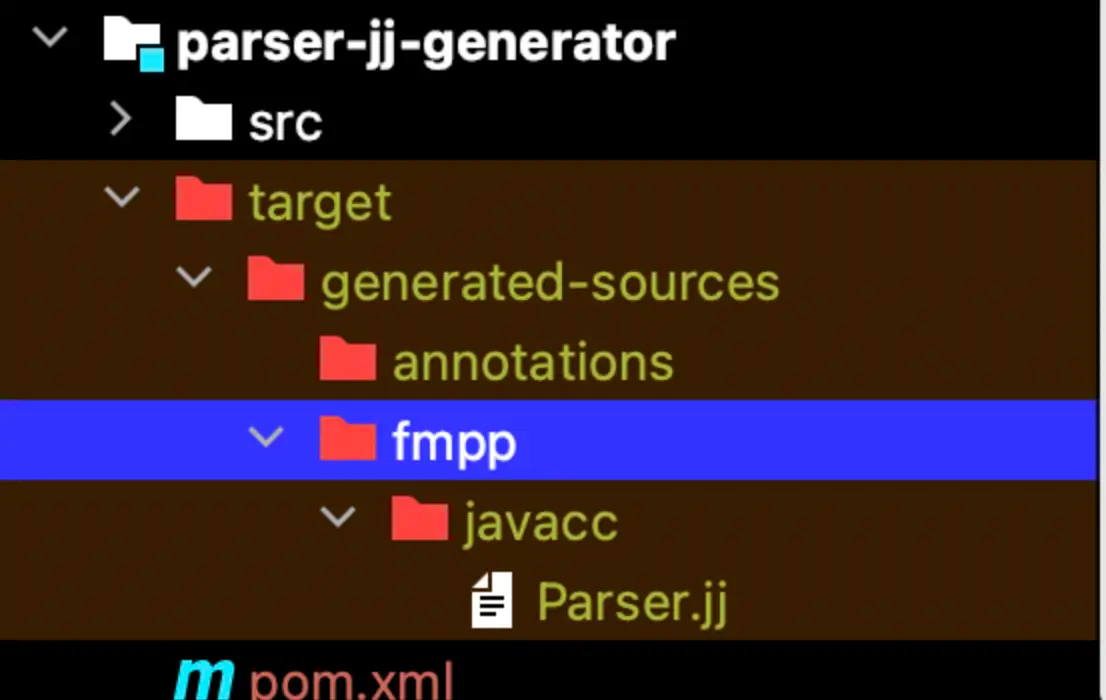
生成Parse.jj
文件目录如下
1
2
3
4
5
6
7
8
9
10
| ├── pom.xml
└── src
├── main
│ ├── codegen
│ │ ├── config.fmpp
│ │ ├── includes
│ │ │ ├── compoundIdentifier.ftl
│ │ │ └── parserImpls.ftl
│ │ └── templates
│ │ └── Parser.jj
|
添加calcite dependency
1
2
3
4
| <dependency>
<groupId>org.apache.calcite</groupId>
<artifactId>calcite-core</artifactId>
</dependency>
|
配置drill-fmpp-maven-plugin插件如下
1
2
3
4
5
6
7
8
9
10
11
12
13
14
15
16
17
18
| <plugin>
<groupId>org.apache.drill.tools</groupId>
<artifactId>drill-fmpp-maven-plugin</artifactId>
<executions>
<execution>
<configuration>
<config>src/main/codegen/config.fmpp</config>
<output>${project.build.directory}/generated-sources/fmpp</output>
<templates>src/main/codegen/templates</templates>
</configuration>
<id>generate-fmpp-sources</id>
<phase>validate</phase>
<goals>
<goal>generate</goal>
</goals>
</execution>
</executions>
</plugin>
|
codegen 模块的文件都拷贝自对应版本的calclite core/src/main/codegen路径 https://github.com/apache/calcite/tree/main/core/src/main/codegen
然后把https://github.com/apache/calcite/blob/main/core/src/main/codegen/default_config.fmpp 中的parser属性与config.fmpp中的parser属性合并。就可以通过mvn package命令生成Parser.jj了。当然,如果有定制化修改的需求,也可以在这个阶段修改config.fmpp
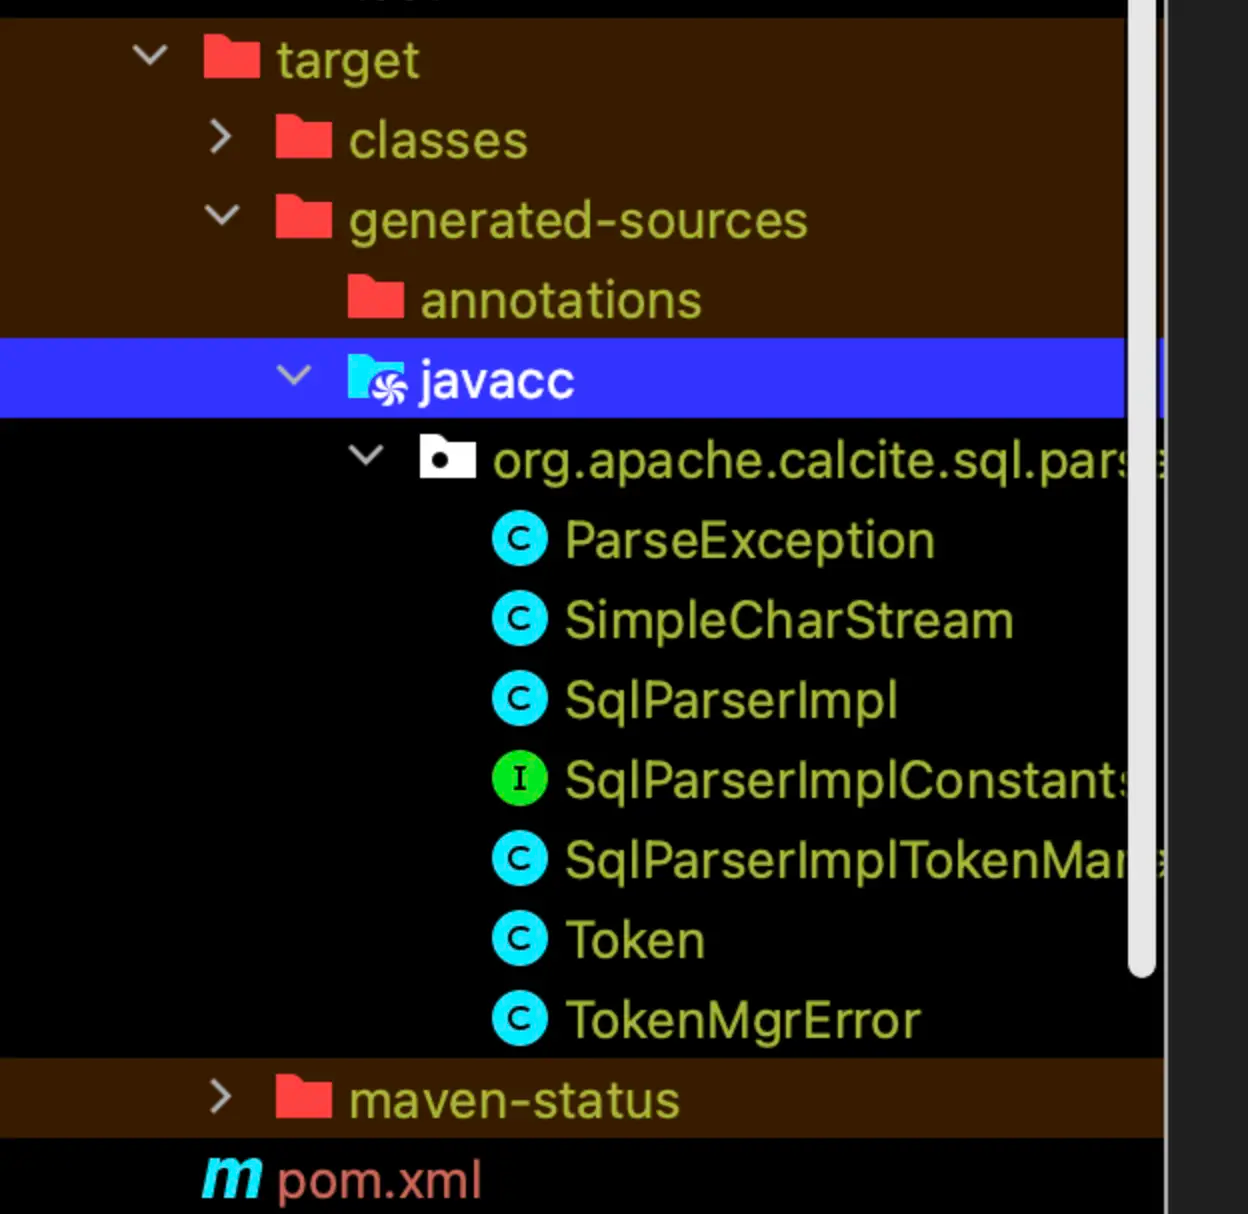
Parser.jj生成java代码
文件目录如下
1
2
3
4
5
| ├── pom.xml
├── src
│ ├── main
│ │ ├── codegen
│ │ │ └── Parser.jj
|
Parser.jj就是我们上一步生成的Parser.jj,如果有什么想要的定制化修改,也可以在这个步骤改入到Parser.jj中。
添加calcite dependency
1
2
3
4
| <dependency>
<groupId>org.apache.calcite</groupId>
<artifactId>calcite-core</artifactId>
</dependency>
|
配置javacc-maven-plugin如下
1
2
3
4
5
6
7
8
9
10
11
12
13
14
15
16
17
18
| <plugin>
<groupId>org.codehaus.mojo</groupId>
<artifactId>javacc-maven-plugin</artifactId>
<executions>
<execution>
<id>javacc</id>
<goals>
<goal>javacc</goal>
</goals>
<configuration>
<sourceDirectory>${project.basedir}/src/main/codegen</sourceDirectory>
<includes>
<include>**/Parser.jj</include>
</includes>
</configuration>
</execution>
</executions>
</plugin>
|
生成代码
无Parser.jj定制化修改,一步生成
如果不需要对Parser.jj进行定制化修改,那么可以通过连续运行两个插件来生成代码,这里给出pom文件样例,不再赘述
1
2
3
4
5
6
7
8
9
10
11
12
13
14
15
16
17
18
19
20
21
22
23
24
25
26
27
28
29
30
31
32
33
34
35
36
37
38
39
40
41
42
43
44
45
46
47
48
49
50
51
52
53
54
55
| <plugin>
<groupId>org.apache.drill.tools</groupId>
<artifactId>drill-fmpp-maven-plugin</artifactId>
<executions>
<execution>
<configuration>
<config>src/main/codegen/config.fmpp</config>
<output>${project.build.directory}/generated-sources/fmpp</output>
<templates>src/main/codegen/templates</templates>
</configuration>
<id>generate-fmpp-sources</id>
<phase>validate</phase>
<goals>
<goal>generate</goal>
</goals>
</execution>
</executions>
</plugin>
<plugin>
<groupId>org.codehaus.mojo</groupId>
<artifactId>javacc-maven-plugin</artifactId>
<executions>
<execution>
<id>javacc</id>
<goals>
<goal>javacc</goal>
</goals>
<configuration>
<sourceDirectory>${project.build.directory}/generated-sources/fmpp</sourceDirectory>
<includes>
<include>**/Parser.jj</include>
</includes>
<lookAhead>2</lookAhead>
<isStatic>false</isStatic>
</configuration>
</execution>
<execution>
<id>javacc-test</id>
<phase>generate-test-sources</phase>
<goals>
<goal>javacc</goal>
</goals>
<configuration>
<sourceDirectory>${project.build.directory}/generated-test-sources/fmpp</sourceDirectory>
<outputDirectory>${project.build.directory}/generated-test-sources/javacc</outputDirectory>
<includes>
<include>**/Parser.jj</include>
</includes>
<isStatic>false</isStatic>
<ignoreCase>true</ignoreCase>
<unicodeInput>true</unicodeInput>
</configuration>
</execution>
</executions>
</plugin>
|